Quick and Simple Guide to High-end Skin Retouching in Photoshop
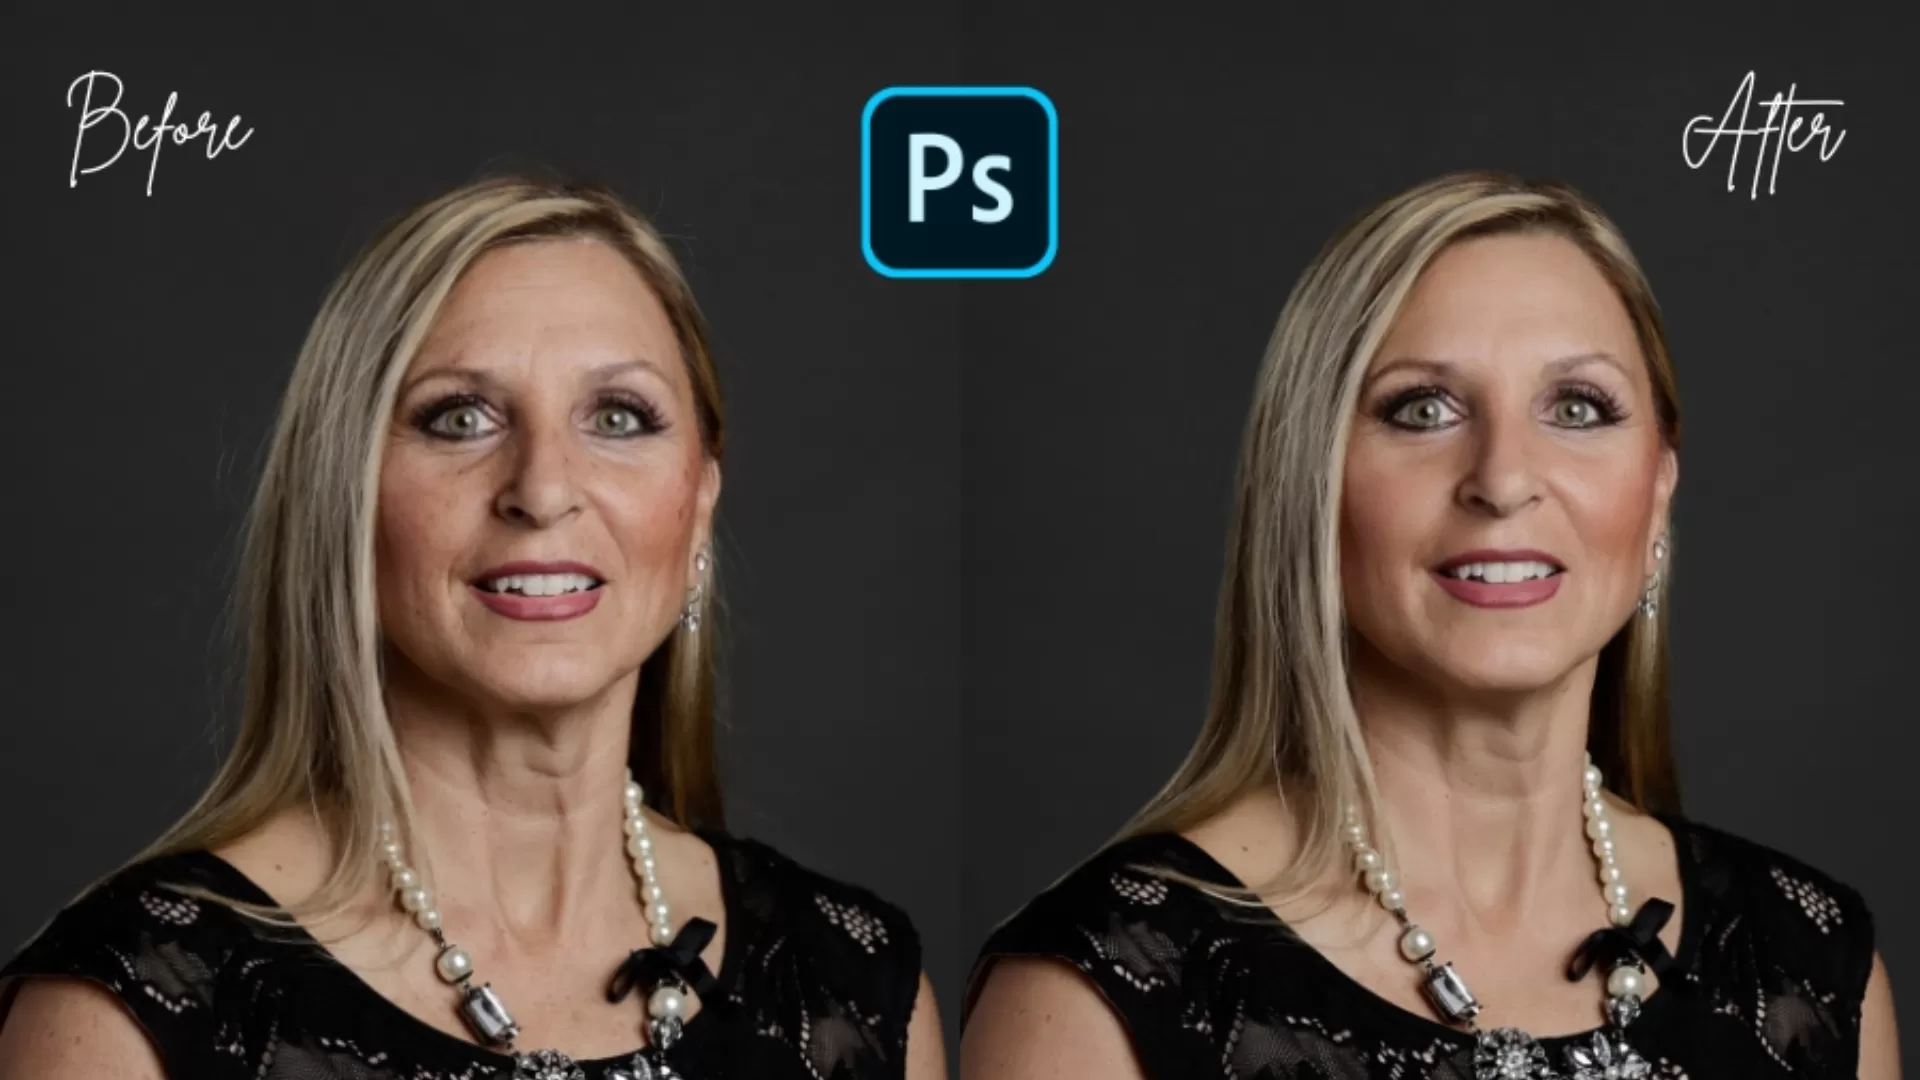
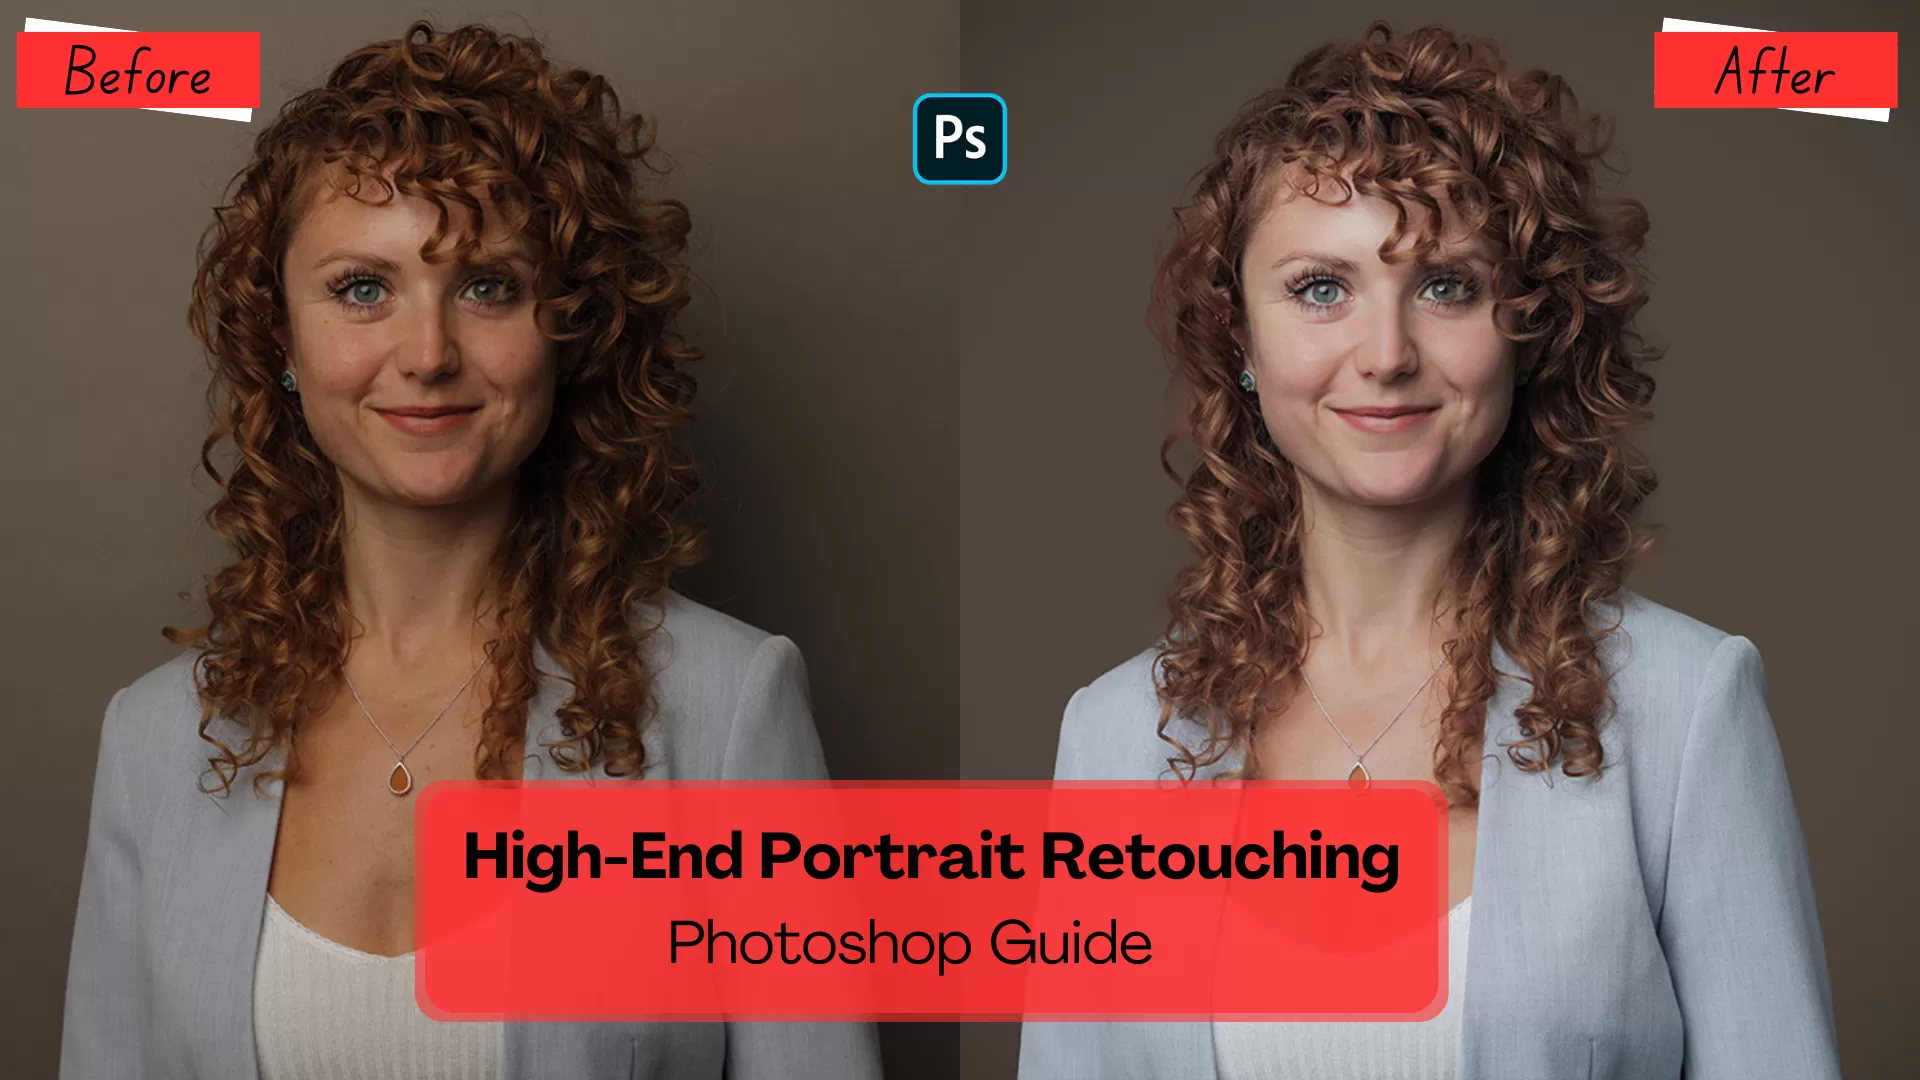
Skin retouching in photoshop could transform the images, offering a polished look that is highly popular in professional photography and digital art. High-end retouching goes beyond smooth skin to basic edits, refined textures, while maintaining an appealing look without compromising on details.
This simple yet quick guide offers easy-to-follow steps, especially for those who wish to learn the art of high-end skin retouching photoshop.
High-End Skin Retouching- What is It?
High-end skin retouching is all about creating flawless and smooth skin while preserving natural detail and texture. Unlike traditional techniques, high-end type technique eliminates all types of imperfections without losing the details, thus resulting in high-quality pictures, best for beauty and fashion photography.
Knowing About Skin Tone and Texture
Before getting into varying techniques and tools, it is crucial to understand what makes the skin better and natural. Skin poses various small details, including fine lines, pores, and subtle tone variations. Moreover, high-end retouching focus on certain points:-
- Texture retainment – Prevent over-smoothing to ensure that skin retains its natural texture.
- Tone balancing – Correct uneven skin tone while properly preserving natural ingredients.
Major Tools in Photoshop for Skin Retouching
Numerous tools for photoshop seem to be invaluable for best skin retouching. So, you should know about certain tools that make your image best.
- Healing brush tool- It effectively eliminates spots and blemishes while maintaining proper texture.
- Clone stamp tool- It replaces pixels from one area of an image with another area.
- Burn and dodge tools – It improves your images shadows and highlights, making it useful to add dimension.
- Blur filter – Editors use this to effectively soften the imperfections during frequency separation.
Step-by-Step Retouching Procedure
Let’s know about the step-by-step procedure that retouches the skin professionally. The process ensures that your image edits seem to be sophisticated and clean.
Blemish Removal
Begin with eliminating unwanted skin marks and blemishes. Here comes the points on how to approach this elimination effectively:-
- Work around 100%-200% zoom to focus on minute details without any need of over-editing.
- Make use of spot healing brush tools. Select this tool, click on the blemish type that you want to eliminate. Then, adjust brush size so it seems little larger than the blemish for best results.
- Then, refine it with a healing brush tool. By holding down ALT in Windows or Option in Mac while painting over the area you wish to fix.
Usage of Frequency Separation
As per experts of portrait retouching photoshop, frequency separation serves as the most famous technique for high-end retouching. This technique separates every image into two layers: one for color tone and the other for texture. Here are the steps of how to do it.
- Ensure to duplicate the background layer twice. Name first duplicate “low frequency” and second as “high frequency.”
- Turn off the high-frequency layer and select the low-frequency layer. Ensure to apply a Gaussian Blur to the low-frequency layer until you don’t know the details in skin but it still could make out general shapes and colors.
- Activate high-frequency layer, then head towards image > apply image. So, set it to subtract a low-frequency layer with certain settings.
- Then, change the blending mode of the high-frequency layer to linear light.
- Now, you possess two layers: low-frequency for tone and color and high-frequency layer for texture.
- Make use of a healing brush tool on a high-frequency layer to clean all blemishes and spots in texture.
- On a low-frequency layer, make use of a clone stamp tool at low opacity, that smoothens uneven skin tones.
Burning and Dodging
This step of burning and dodging includes darkening and lightening areas of the image that enhances its details and depth. Here comes the steps to use this procedure:-
- Create a new layer while setting soft light to it.
- Make use of a brush tool with low-opacity and soft brush that carefully paints areas that require lightening or darkening.
- Dodge areas, like cheekbones and forehead along with the nose’s bridge, seem to be more enhanced.
- Burn areas, like the nose’s sides, jawline, and under cheekbones, seem to be more depthful.
Working with Cloning and Healing Tools
For various small imperfections, like fine lines, pimples, and stray hairs, experts at portrait retouching services make use of certain tools:-
- Make use of a spot healing brush tool that eliminates small blemishes.
- Usage of a healing brush tool enables you to smoothen skin texture while applying it to certain areas that require correction.
- For large areas with seamless texture, clone stamp tool is perfect when it is applied lightly.
Sharpening Skin Texture
Sharpening adds charm and effectively helps skin to retain its appearance. Here are the steps to make the image more sharpened.
- Combine all copies of visible layers just by pressing Ctrl+Alt+Shift+E.
- Then head towards Filter > Other > High Pass and then set radius between 1-2 pixels.
- Now, change the blending mode of the high-pass layer to soft light or overlay for soft sharpening. You need to adjust the opacity to get the best look.
Final Enhancement
When the skin gets retouched, you should enhance your images with final adjustments:-
- Ensure to apply gradient maps or selective color, as it effectively adjusts overall color tone. And, to achieve a natural look, prevent overly saturated colors.
- Enhancing contrast very slightly adds dimension to face. So, make use of levels or curves to get this type of image.
- Make sure to apply a subtle vignette that draws focus to your face on the image.
Maintenance of Natural Look
While doing best skin retouching, here comes some crucial steps to maintain your natural look:-
- Ensure to keep a backup of your original picture, as it enables you to compare your work during editing.
- Consistently zoom in and for more detailed work and zoom out to check overall appearance.
- It is mandatory to step back from your work periodically, as it helps you to spot various unnatural effects.
- Prevent heavy blurring of images, as it might erase details and pores.
- Low-opacity settings result in subtle effects, enabling for various gradual changes.
- If the effect is highly strong, make use of a layer mask and apply it cautiously and selectively.
Best Tips for Skin Retouching
Skin retouching serves as a valuable skill for digital artists, photographers, and anyone who desires to improve portraits. The major goal is to maintain a natural look, that preserves depth and texture while eliminating all imperfections. Here are some best tips for skin retouching that offer realistic and polished results.
Begin with High-Quality Image
Skin retouching is highly effective with clear and high-quality images. High resolution images capture high details that are crucial for getting real touch to images. Start by selecting the pictures with less noise and better lighting, as these factors effectively help in maintaining skin texture and makes the retouching procedure manageable.
Ensure to Duplicate Background Layer
Before doing any sort of adjustments, duplicate the original background layer. This enables you to preserve an untouched image if you require it to revert to it later. So, working on a duplicate layer allows you to compare the original with the edited version to ensure that you are improving the images without overdoing it.
Usage of Frequency Separation
As per experts at skin retouching photoshop, frequency separation serves as a most famous technique that separates the skin color and texture into varying layers. This enables you to work on your pores, blemishes, and various other imperfections differently without disturbing skin’s natural texture.
In this process, one layer gets blurred to offer a low frequency layer that only focuses on tone and color, while another layer, high frequency keeps fine details.
Make Use of Certain Tools
Varying tools, like spot healing and healing brush serves as an excellent tool that effectively eliminates scars, blemishes, and spots. However, you need to stay cautious with all these tools, as overuse could result in an unnatural look.
Skin Tone Adjustment
Skin tone adjustment serves to be mandatory to achieve a radiant, uniform look. Make use of adjustment layers, to even out skin tones and to add warmth if required. These tools effectively help in management of color consistency of skin, that removes uneven color and redness.
Prevent Skin Over-Smoothing
The common mistake in skin retouching is over-smoothing, that effectively eliminates skin issues with images and offers the skin with realistic appeal. To prevent fine lines on skin, keep the opacity levels low while smoothing.
Addition of Subtle Glow
To create a more radiant look, consider adding a perfect glow to skin. Make use of certain tools that highlight areas that make your image more appealing. Certain tools could add a slight shadow around your face’s sides that enhances definition and depth.
Maintain Realistic Texture
To improve skin texture, ensure to use a high pass filter. Duplicate the layer on which you have been working on, and set the image’s radius to low value. This makes skin more natural instead of getting overly smooth. Ensure to adjust the opacity that controls its intensity and blend it in subtly.
Usage of Burn and Dodge
Burn and dodge techniques seem to be powerful to create contours and face shaping. Just by darkening and lightening certain areas, you could improve features and add depth to your skin, giving your skin a realistic look. Ensure to create burn and dodge adjustments to properly maintain entire control on your work.
Retouch Target Medium
Just keep in mind where images would be displayed as varying platforms might need varying retouching approaches. For social media, images might get sharp, so prevent much sharpening. For print purposes, textures seem to be more visible, so subtle adjustments seem to be best.
Zoom Out and In
Regular zooming out and in while working enables you to see both composition and fine details, ensuring a balanced retouching. And, working too close to minute details without checking the overall picture could result in over-editing. Zooming out offers fresh perspective, thus helping you to prevent various heavy edits that detracts from natural appeal.
Prevent Over-Retouching
The key to professional skin retouching seems to be restraint. It seems easy to carry away, especially when zoomed into imperfections. Ensure to aim for a natural and balanced finish by stepping back away from your work and coming with fresh eyes.
Conclusion
High-end skin retouching photoshop doesn’t seem to be daunting. With appropriate techniques and tools, you could create high-quality and more polished results. Usage of various healing tools serves as the best steps to get flawless skin that seems to be natural.
Practice makes perfect, and retouching is a skill that gets well with time. With this quick guide, you could easily master high-end skin retouching in photoshop. So, try out new things and settings, and develop an eye for more detail.


