How to Correct White Balance in Photoshop
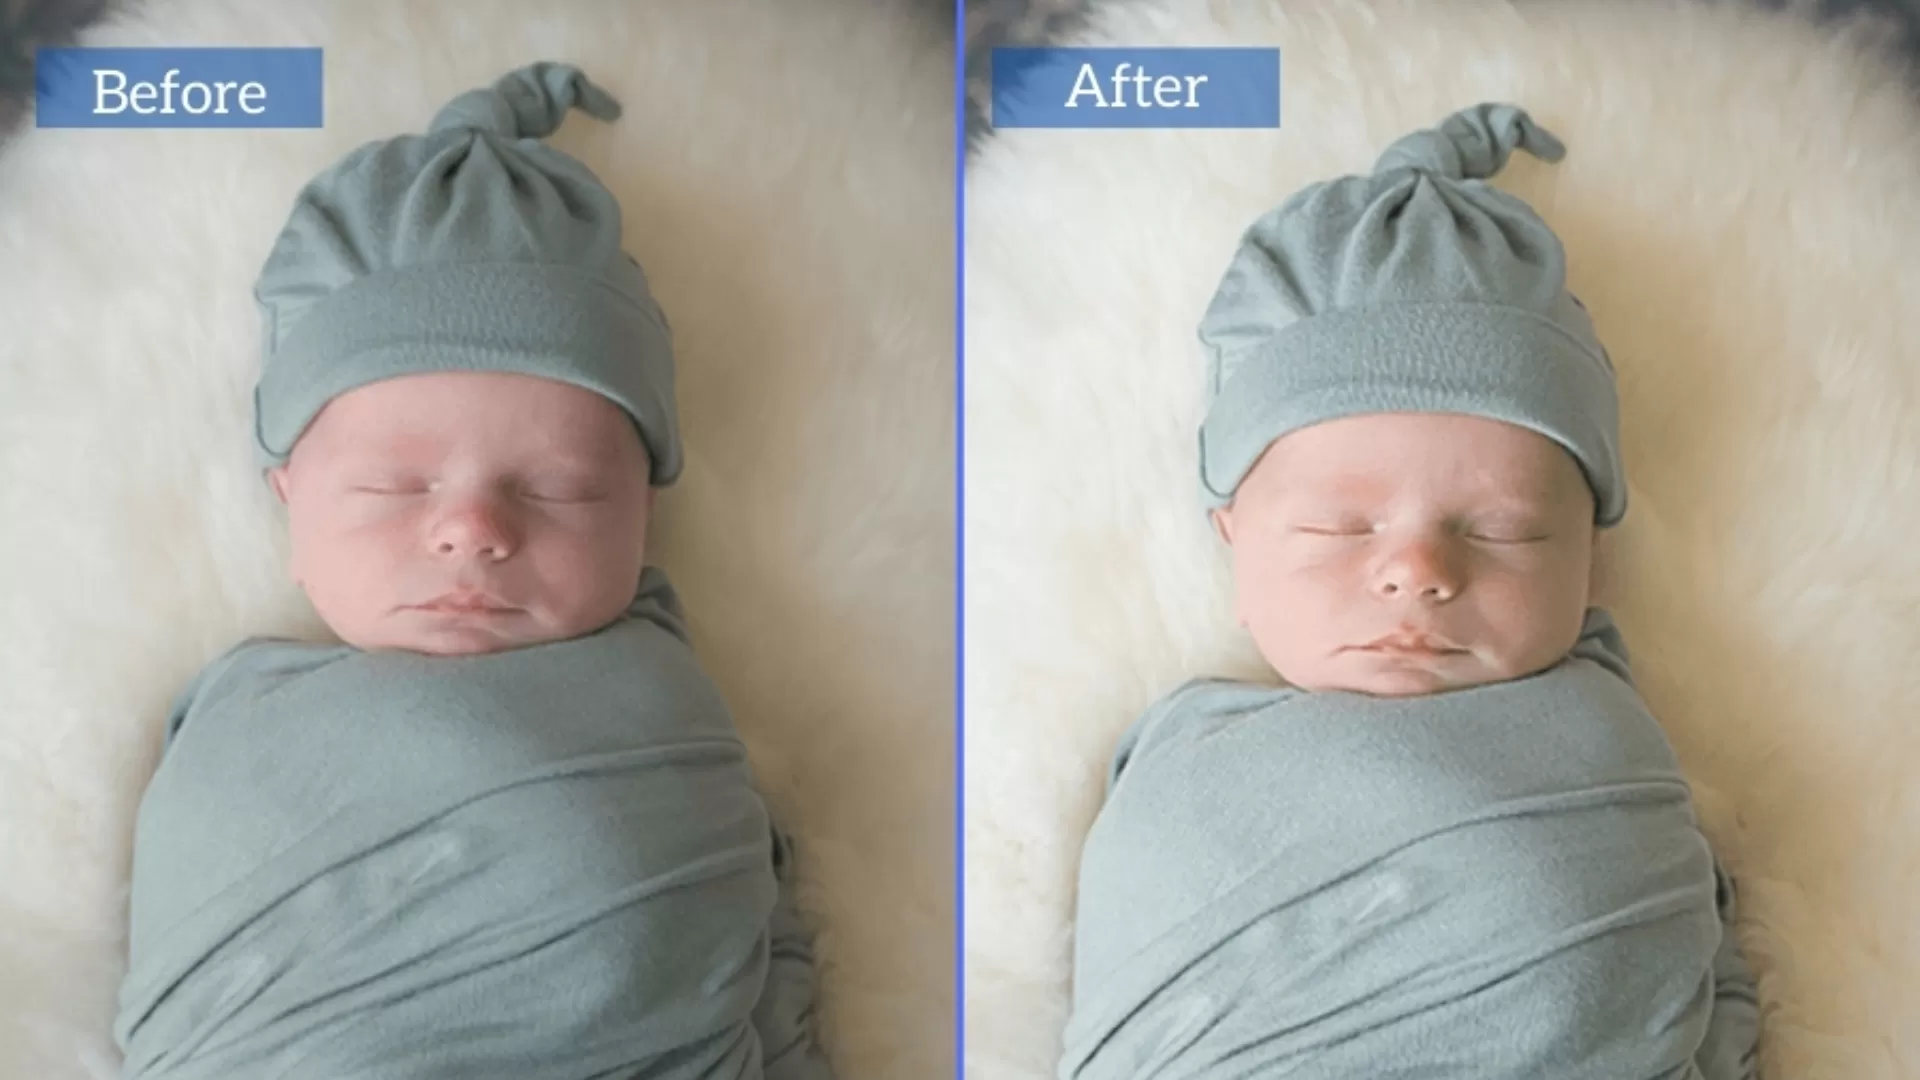
Before we discuss the ways to correct white balance, we like to mention that the best approach is, of course, to try to set your white balance correctly during the shot. This minimizes post-processing work. As you already did the white balancing through the camera, your photos look good from the start. Despite that, you can also get it adjusted by yourself or by contacting experts at any reputed image editing company.
We also know that, sometimes your images have the perfect white balance, other times it's way off. When it's not up to the mark, you can simply get it adjusted in Photoshop.
Adjusting White Balance Through Camera
These days almost every camera is digital. These cameras come with white balance settings. So when you’re shooting outdoors, look for white balance setting, and change it to sun in your camera. Similarly, you should switch the setting for cloudy weather, and so on.
Additionally, many high-end digital cameras allow you to manually adjust custom white balance values. If that option is not available in your camera, you can use tools like ColorChecker or X-Rite Photo to assist with this if you choose to go down this path.
Correct White Balance in Photoshop- Step-by-Step Guide
White balance is all about having a photo where colors appear accurate under different lighting conditions. When it's off, your image might look overly blue, orange, or green. Photoshop has features to manually fix white balance by targeting three critical color points: black, white, and neutral gray. This method provides precision and is ideal for photographers who want consistent color across their edits.However, its always recommended to contact an expert image editor rather than trying your hand with a complex tool like Photoshop.
Still, if you want to do it by yourself this tutorial will walk you through each step to correct white balance in Photoshop using Curves adjustment layers and the Color Sampler Tool.
Step- 1: Open Your Image and Prepare the Workspace
Start by opening your photo in Photoshop. For maximum control over tones and colors:
1. Go to the top menu and select the image. After that choose mode, and later 16 Bits/Channel
This step is optional but highly recommended to reduce data loss during adjustments.
Step 2: Identify and Set the Black Point
To begin correcting white balance, you first need to locate the deepest black tones in your image.
A. Add a Threshold Layer
1. Click on the ‘Create new fill or adjustment layer’ icon at the bottom of the Layers panel.
2. Choose Threshold from the list.
B. Find True Black Areas
3. In the Threshold Properties, move the slider all the way to the left.
4. Slowly drag the slider to the right until large black areas begin to appear.
Avoid tiny black specks—they usually represent pure black (RGB 0,0,0) and carry no useful color data.
C. Use Color Sampler to Mark Black Point
5. Activate the Color Sampler Tool (nested under the Eyedropper Tool).
6. Zoom into one of the dark areas (press and hold Z, then click to zoom).
7. Click once on a black region to place a Color Sample Point 1.
D. Add a Curves Layer
8. Create a new Curves Adjustment Layer using the Adjustments Panel.
9. Immediately delete the Threshold layer used in this step.
E. Assign the Black Point
10. In the Curves properties, select the black eyedropper icon (first of the three).
11. Click directly on your previously placed Color Sample Point to set the black point.
Step 3: Identify and Set the White Point
Now that the shadows are balanced, let’s adjust the brightest parts of the image.
A. Add Another Threshold Layer
1. Again, add a Threshold adjustment layer.
B. Find True Whites
2. This time, slide the Threshold control all the way to the right.
3. Slowly move it back to the left until you see large white regions appear.
4. Avoid overly bright spots like reflections or blown-out areas; they don't represent true white.
C. Sample the White Area
5. Turn off visibility of other layers temporarily (Option-click the eye icon of the background layer).
6. Use the Color Sampler Tool again to mark a bright but non-reflective white area (Color Sample Point 2).
D. Add Another Curves Layer
7. Create a new Curves Adjustment Layer.
8. Delete the Threshold layer once you’ve placed the white sample.
E. Set the White Point
9. In the Curves panel, choose the white eyedropper (third one).
10. Click on your white sample point to correct the white balance for highlights.
Step 4: Identify and Set the Neutral Gray Point
Setting the gray point corrects midtones and ensures overall color neutrality.
A. Create a 50% Gray Layer
1. Create a new empty layer (Shift+Cmd+N on Mac or Shift+Ctrl+N on Windows).
2. Open the Fill dialog box (Shift+Delete on Mac or Shift+Backspace on Windows).
3. In the Fill window, choose 50% Gray and click OK.
B. Set Blend Mode to Difference
4. Change the blend mode of the gray-filled layer to Difference.
This mode will help you identify true neutral grays in the image when combined with Threshold.
C. Use Threshold Again
5. Add a new Threshold adjustment layer.
6. Slide the control from left to right slowly until you spot small gray patches.
Since the gray layer is blended with “Difference,” these patches are where the image matches the gray.
D. Mark the Gray Point
7. Use the Color Sampler Tool and place a third point (Color Sample Point 3) on one of the small gray areas.
E. Add Final Curves Layer
8. Create a third Curves Adjustment Layer.
9. Delete both the Threshold and 50% Gray layers from the Layers panel.
F. Assign the Gray Point
10. In the new Curves layer, select the gray eyedropper (middle one).
11. Click directly on the gray Color Sampler point to finalize your midtone balance.
Step 5: Clean Up and Final Adjustments
- You now have three Curves layers:
- Rename each layer for clarity (e.g., “Black Point Curve”).
- You can adjust the opacity of each Curves layer to fine-tune the results.
- Toggle Color Sample Points with Cmd+H (Mac) or Ctrl+H (Windows).
- To delete a sample point, use Option+Click (Mac) or Alt+Click on it.
One for Black Point
One for White Point
One for Gray Point
What If You’re Unable to Correct White Balance in Photoshop?
Yes, there is a probability that, you tried all the steps, still didn't get the desired results. In that case, you can contact Global Photo Edit. You can also contact us when not interested in going into the nitty gritty of Photoshop. Here are some reasons for choosing Global Photo Edit.
Unparalleled Expertise
In the age of Instagram and Pinterest, where visual content often trumps textual information, the power of a well-edited image cannot be overstated. It’s the difference between a photo that garners a second glance and one that’s scrolled past.
Global Photo Edit boasts a team of highly skilled professionals, each with years of experience in various aspects of photo editing. To stay abreast of the latest trends and techniques, their team undergoes regular training sessions and workshops.
Diverse Skill Set
From retouching to restoration, Global Photo Edit is the best image editing service provider. Whether it’s removing blemishes, adjusting lighting, or restoring old photographs, their editors cover all bases. Many clients appreciate the wide range of editing styles available, from classic and whimsical to modern and minimalistic.
Technological Advancements
Global Photo Edit employs the latest software tools to ensure the best results. By using advanced editing suites like Adobe Photoshop and Lightroom, we’re able to provide high-quality edits that preserve the integrity and originality of your images.
- Incorporating the Latest Trends: From AI-powered edits to HDR processing, we stay ahead of the curve, incorporating cutting-edge techniques that set your images apart.
- Feedback Loop: we actively welcome client feedback to fine-tune our services and explore new technological avenues.
Customer-Centric Approach
Understanding that each project is unique, Global Photo Edit offers personalized solutions for every client. We do so as the end result aligns perfectly with our customers' vision. Through constant communication, clients are kept in the loop throughout the editing process.
Timely Delivery
In the digital world, timing can be everything. Global Photo Edit prides itself on adhering to deadlines without compromising quality. Quick turnaround times have been a consistent source of praise in client testimonials.
Competitive Pricing
While high-quality photo editing can often come with a hefty price tag, Global Photo Edit provides competitive rates that reflect the value of their services without breaking the bank, especially for small businesses and freelance photographers.
Our pricing packages are designed to cater to diverse needs and budgets, making professional photo editing accessible to all.
Conclusion
Correcting white balance using black, white, and gray points is more accurate than relying on auto adjustments or filters. This method gives you fine control over how each tonal range is balanced, ensuring skin tones, shadows, and highlights all look natural and consistent.
Whether you're working on portraits, landscapes, or product shots, mastering this technique will elevate the quality and professionalism of your edits. If you need any help, reach out to Global Photo Edit- best image editing company. Feel free to explore our official website for more information and to view a comprehensive gallery showcasing our exemplary work.
Frequently Asked Questions
White balance refers to the color temperature of an image and determines how colors appear under different lighting conditions. When your image has a proper white balance, skin tones appear natural, and colors are true to life. Incorrect white balance can make your photo appear overly blue, yellow, or green.
Yes, Photoshop allows precise manual white balance correction using Curves Adjustment Layers and the Color Sampler Tool. But for that, you need to have expertise in the tool.
Global Photo Edit offers expert photo editing services, including white balance correction, retouching, background removal, and more. Our experienced team ensures high-quality results tailored to your needs. We help you save you time while delivering polished, professional images.


