How to Create Simple Manipulation With Lighting Effects in Photoshop?
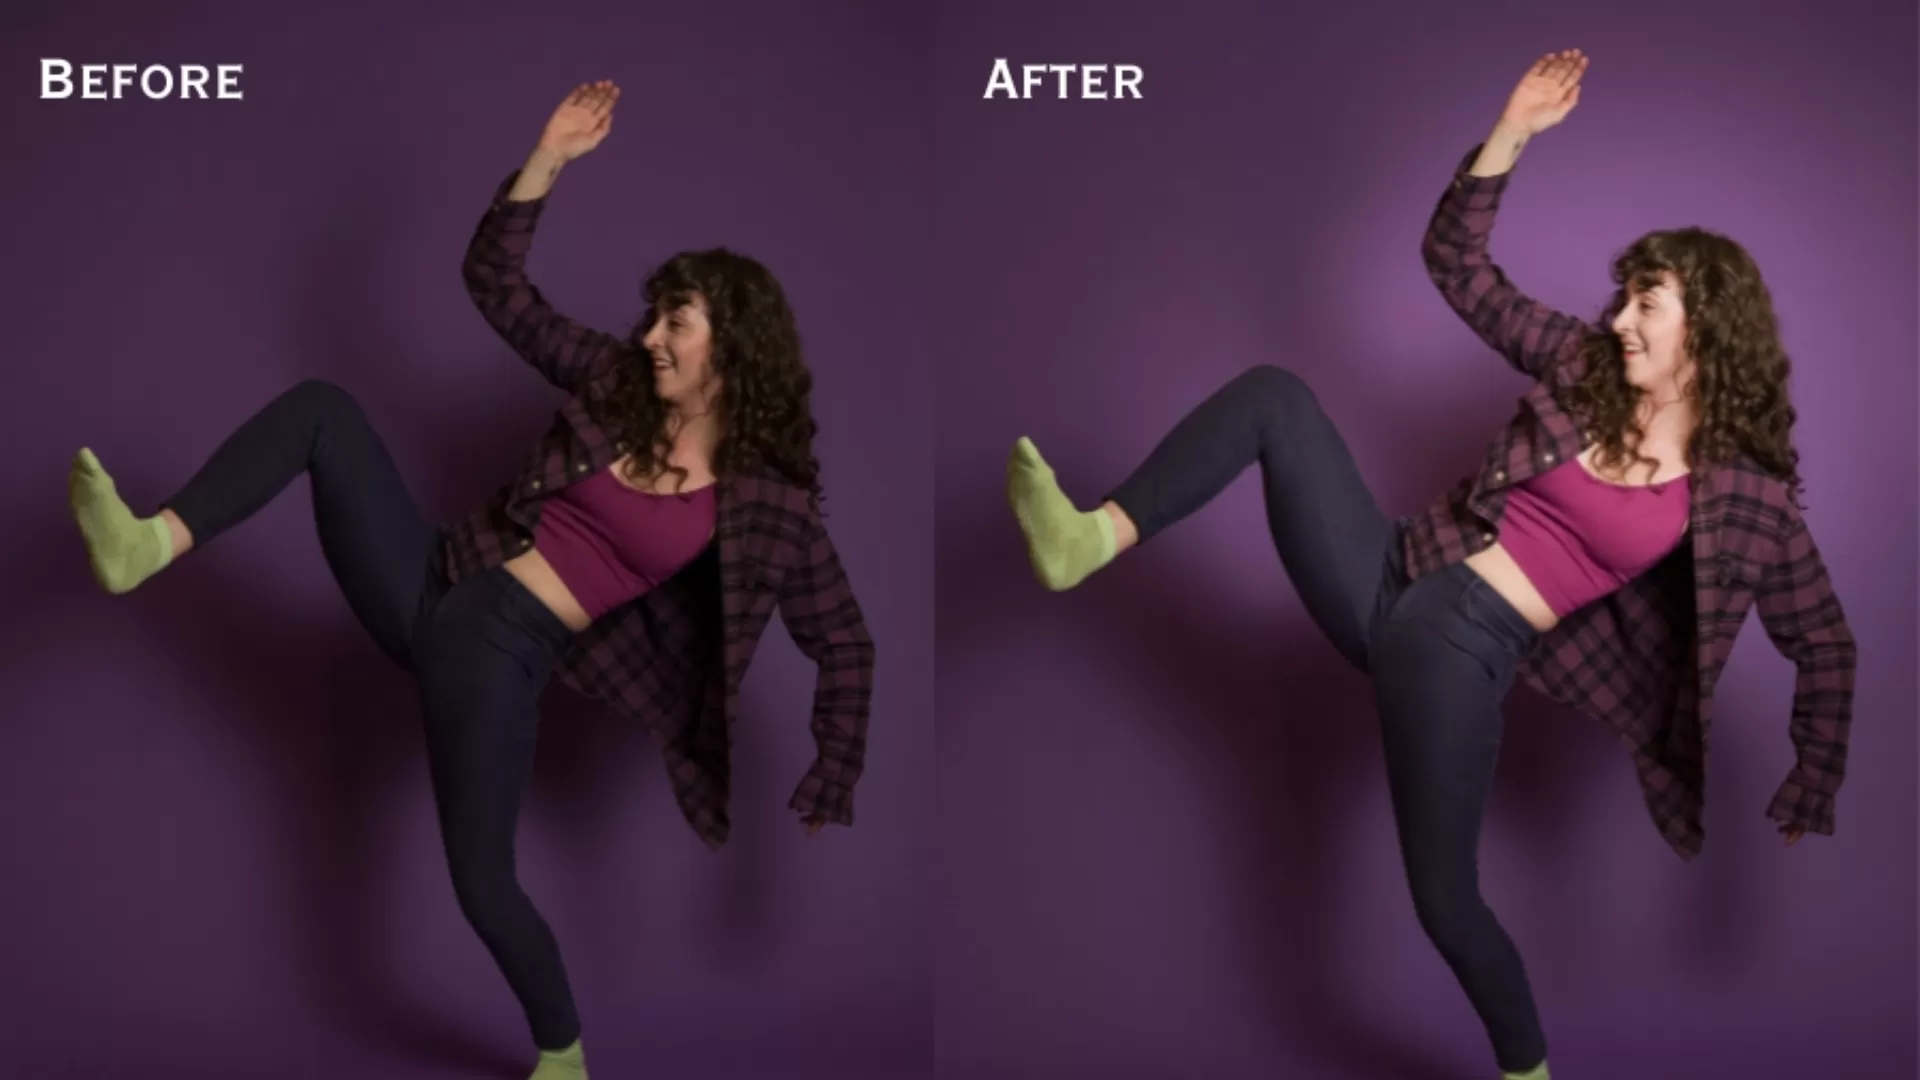
Lighting effects are one of the most engaging instruments when it comes to turning the rather mundane photographs into the striking visual masterpieces. When implemented they enhance depth, focal points and overall mood of a design and assist in drawing the attention to suitable areas. No matter what project is on a business level or for fun, it is crucial to know how to work with lighting effects in Photoshop.
In this blog, we will have a step-by-step guide on how to achieve basic lighting manipulation in Photoshop that preserves the quality of the design but also makes it visually appealing. These tips will make ecommerce image editing services more realistic, and likable.
Understanding the Importance of Lighting in Visual Design
Before delving deeper into the tactics, it is crucial to establish why light is such an important aspect in the graphic arrangement. In digital manipulation, light does not just enlighten the subject, it establishes the tone, introduces emphasis, and brings depth. From replicating natural light to developing otherworldly illumination, understanding this tool lets designers narrate through their creation.
From minor alterations to significant changes that can completely change the look of your images, Photoshop allows you to play with the lights. Now, let me elaborate the steps on how to achieve these effects.
Method 1: Adding Lighting Effects Using the ‘Lighting Effects’ Filter
The Lighting Effects filter is one of the powerful and easiest methods of adding lighting in photoshop. This method is widely used in ecommerce image editing. One of the advantages of this method is the great possibility of control in regard to light angles, color, and moreover, intensity.
Step-by-Step Guide:
- Open Your Image in Photoshop
Start by loading the image that you wish to manipulate. Check that the layer which is currently active is now turned into a Smart Object. This step is important because you can still knock the settings out of alignment using this tool and the changes done are non-destructive. - Navigate to the Lighting Effects Filter
Navigate to Filter > Render > Lighting Effects. You will find a dialog box with a few options for the type of light such as Spot, Point and Infinite Light.
o Spot Light is best suited for pointing on particular areas.
o Point Light, as the name infers, lamps the image from a point, just like a bulb.
o Infinite Light gives diffuse, uniform light to the whole area of the painting. - Adjust Lighting Properties
So once you select a type of light, you can decide on the intensity, color, and angle at which it is placed. It also provided various control points and you can move the light source at the figure simply by dragging points on the canvas. You also have an option that enables control of the texture of your image from the surface properties displayed in this dialog box. - Refine with Shadows and Gloss
To change the reflection on the subject surface, just move gloss and material sliders that will make your object shiny or matte. The Shadow slider allows the adjustment of both the intensity and the extension of the shadows being created by the light. - Apply and Review
When you are satisfied with the changes that you have made, click on ok to apply the effect on the lighting. The reason why you can still go back and edit is because we applied the effect on a Smart Object.
Method 2: Using Overlay and Gradient Maps for Custom Light Effects
Another technique which enables one to be more liberal in an image involves layer modes in addition to gradient maps as a way of introducing light. Unlike Auto, this method is artistic and allows you to control color grading and blending of the lighting effects.
Step-by-Step Guide:
- Create a New Layer for Light Effects
The first step is to create a new layer over your image in photoshop. This layer will be devoted to your light manipulations, the bottom layer will contain the initial image. - Choose the Brush Tool
Using the Brush Tool (B), capture a round soft brush. However, while painting, ensure that the brush opacity is slightly low, say between 10% and 20%. A light color such as white or yellow should be used to reflect light to an extent that is similar to that of natural light. - Paint Over Key Areas
Start painting over the areas which you want to get illuminated. Finite the effect by focusing on certain parts such as the edges or corners, according to the preference. This method is more suited for portrait photography, as it has the potential to accent specific areas of the face. - Change the Layer Blending Mode
In the layer’s blending mode choose overlay or soft light. These two modes will mix the light effect into the image in a natural way at the end of the process. - Adjust with Gradient Maps
If you would like to give more complicated lighting effects, place a gradient map over the light layer. In ecommerce image editing, select the layers and go to Image > Adjustments > Gradient Map and you will be able to view the desired color combination. For instance, by employing warm colors such as oranges and yellows a ‘golden hour’ look will be achieved. - Fine-Tune with Opacity and Blur
Reduce the brightnessof your light layer so that the result is not too striking on the outside to those around you. You can also adjust the amount of Gaussian Blur (Filter > Blur > Gaussian Blur) in order to eliminate sharp edges on the light source.
Tips for Enhancing Lighting Effects for Better Ecommerce Image Editing
- Combine Techniques: In order to achieve more varied lighting, it is recommended to use both of the above approaches together. For instance, you bring in the basic light source with the Lighting Effects filter then combine it with targeted sources by means of custom light layers or gradient maps.
- Experiment with Colors: Lighting isn’t always white or yellow, is what I learned from this article. Applying different color lighting can have a vast effect on the overall mood of an image, such as, using blue light to give it a night effect or using reds to give it that intense look.
- Non-Destructive Editing: When it comes to effects in Photoshop always apply the effects on a Smart Object or on copied layers, this way the change can be made later. This practice assists in the preservation of your originality of the pictures.
Conclusion
Adjusting an image might sound like a small change when it comes to the actual practice of adding simple lighting effects in Photoshop thus making your design much better. From expressing drama to the focus of the image, control of light helps to drive the story of the picture. When using Photoshop filters or layer overlays and gradient maps, knowing how to work with light will enhance the overall impact of your digital artwork.
Remember, practice is key. The more you try different light sources and different blending modes the better you will become a master of light. Therefore, do not hesitate—let the light become the guide in the next Photoshop project and enjoy the result. For all sorts of image editing, contact Global Photo Edit. We offer ecommerce product photo editing services, and many more specialized services as well.


