How to Use the Liquify Tool in 2 Ways in Photoshop

Global Photo Edit understands the importance of having the right tools and techniques at your disposal as an expert in the field. One of the most powerful tools in Adobe Photoshop for enhancing portraits is the Liquify tool. Whether you are a beginner or a seasoned pro, mastering the Liquify tool can significantly uplift your photo editing game. We will walk you through two effective ways to use the Liquify tool, ensuring your images stand out with that professional touch.
1. Understanding the Liquify Tool
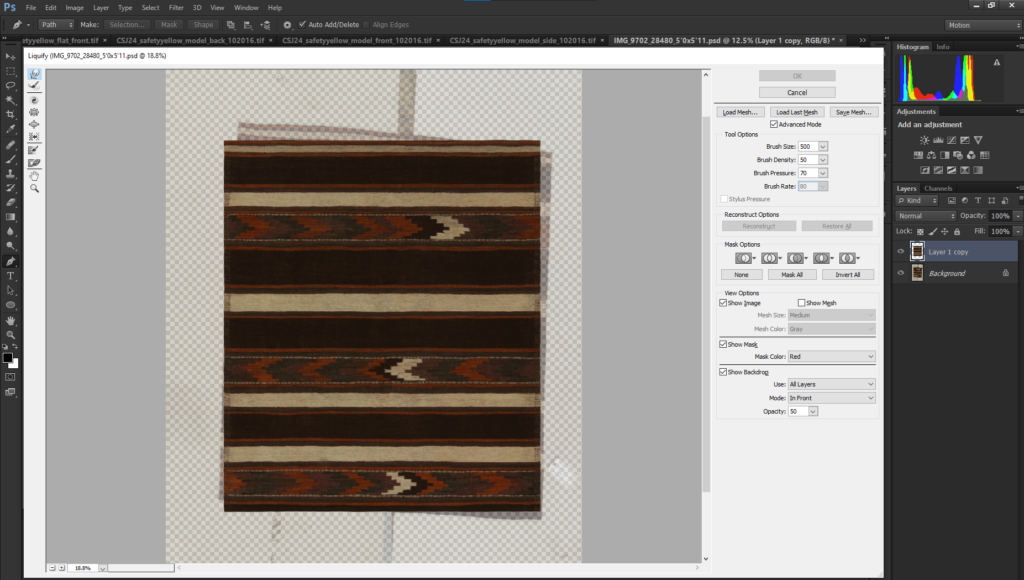
Let’s understand what the Liquify tool is all about before diving into the techniques. This tool allows you to push, pull, rotate, reflect, pucker and bloat any area of an image. It’s particularly useful for making subtle adjustments to portraits, like enhancing a smile or adjusting the shape of eyes.
2. Way 1 – Subtle Portrait Enhancements
- Open Your Portrait: Start by selecting a high-quality portrait image. Remember, the finer the details, the better the outcome.
- Select the Liquify Tool: Navigate to ‘Filter’, then choose ‘Liquify’.
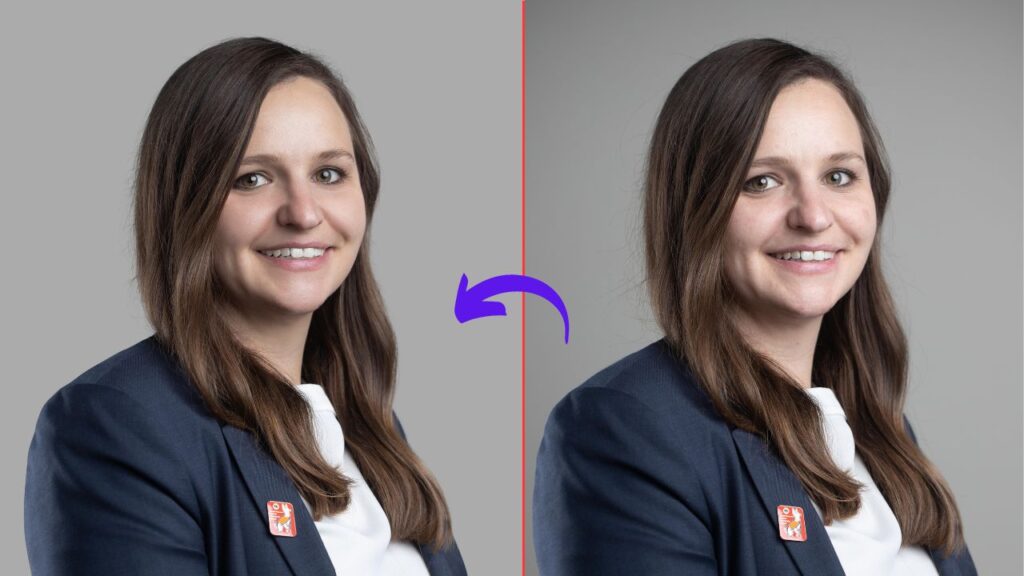
- Use the Face-Aware Liquify: Photoshop offers a Face-Aware Liquify feature, which automatically detects facial features, making it easier to make precise adjustments.
- Make Subtle Adjustments: Use the sliders to subtly adjust eyes, nose, mouth and face shape. Remember, the key is subtlety.
3. Way 2 – Creative Image Transformation
- Prepare Your Image: Choose an image that could benefit from creative transformation.
- Select the Liquify Tool: Same as before, navigate to ‘Filter’ and then ‘Liquify’.
- Experiment with Tools: Instead of Face-Aware features, use the forward warp, pucker and bloat tools to creatively alter the image. This approach is perfect for artistic projects or distinctive looks.
- Finalize Your Creation: Adjust your changes and finalize the image. Remember, creativity is the limit!
4. Advanced Tips and Tricks
It’s important to know some advanced techniques to truly master the Liquify tool:
- Use a Graphics Tablet: For more control and precision, using a graphics tablet can make a significant difference.
- Work in Layers: Always work on a separate layer to keep your original image intact.
- Shortcuts Are Your Friends: Learning keyboard shortcuts can speed up your workflow.
5. Global Photo Edit’s Expertise
Global Photo Edit prides itself as a Professional Portrait Photo Editing Company. Our experts use tools like Liquify to deliver top-notch quality in every project. We ensure every image we touch turns into a masterpiece from image background removal services to detailed portrait retouching.
6. Common Mistakes to Avoid with the Liquify Tool
It’s easy to fall into some common pitfalls while the Liquify tool is incredibly powerful:
- Overdoing Adjustments: One of the most common mistakes is overusing the tool, leading to unnatural and sometimes comical results. Always aim for subtlety.
- Ignoring Image Quality: High-resolution images yield the best results. Low-resolution images can pixelate and distort easily.
- Forgetting to Save Progress: Regularly save your work in stages to avoid losing progress if Photoshop crashes.
7. The Role of the Liquify Tool in Image Background Removal
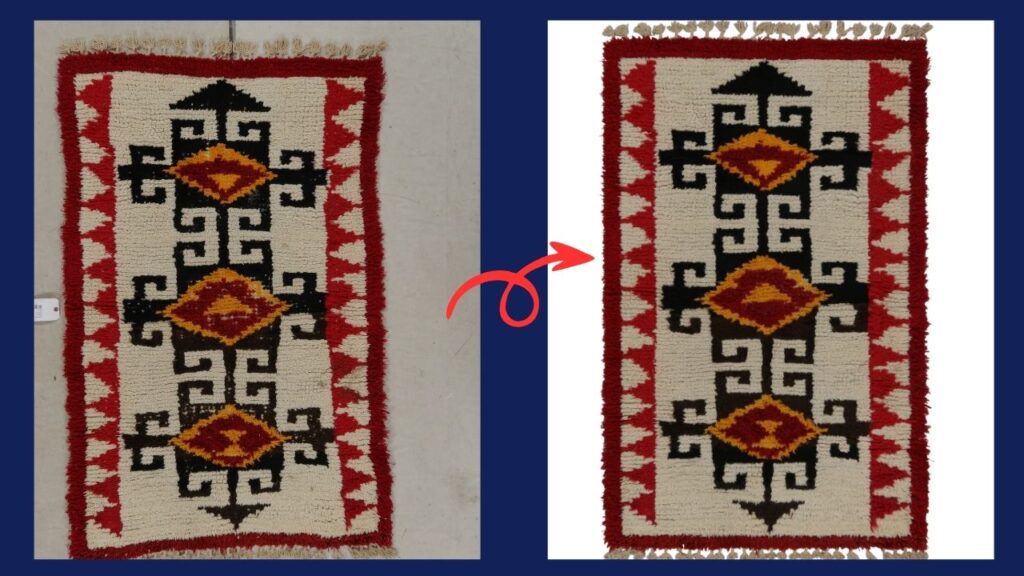
The Liquify tool can also play a crucial role in Image Background Removal Services although primarily used for portrait adjustments. It can be used to refine edges and ensure the subject of the photo integrates seamlessly with a new background. This is especially useful in professional portrait photo editing, where precision is key.
8. Step-by-Step Guide to Using the Liquify Tool for Background Removal
- Isolate the Subject: Use Photoshop selection tools to isolate the subject from the background.
- Apply the Liquify Tool: Gently use the Liquify tool to refine the edges of the subject, making the transition to the new background smoother.
- Add a New Background: Once you are happy with the modifications, introduce your chosen background and seamlessly integrate it with the main subject to achieve a realistic appearance.
9. Enhancing Your Workflow with Global Photo Edit
Global Photo Edit understands that time is of the essence in professional photography. Our team uses efficient workflows incorporating the Liquify tool and other advanced Photoshop techniques to deliver outstanding results quickly. You not only save time but also ensure that your images are in the hands of experts by outsourcing your photo editing needs to us.
10. Case Studies and Testimonials
- Describe a specific project where the Liquify tool was crucial.
- Another example of a challenging project handled by Global Photo Edit.
- Insert client testimonials praising the quality, efficiency and creativity of Global Photo Edit’s services.
Conclusion:
Mastering the Liquefy tool in Photoshop can transform the way photographers, particularly those focusing on portraits, edit their images. This tool is essential whether the goal is to make subtle improvements to portraits or to undertake extensive removal of image backgrounds. Global Photo Edit offers specialized photo editing services designed to elevate the quality of your photographs, ensuring they stand out, especially when a professional touch is required.
Frequently Asked Questions

Graphic Design Tools For Various Design Teams for 2024
Graphic design transcends geographical barriers and Global Photo Edit is at the forefront of this transformation. Our...
Read More
The Beginner’s Guide to Portrait Retouching Using AI and Traditional Tools
Today, portrait retouching is one of the vital components of modern photography, which makes great...
Read More
Best Ways To Adobe Photoshop Download For PC (Free Version of 2024)
Adobe Photoshop continues to be a fundamental tool for both professionals and hobbyists in the...
Read More
Best Clipping Path Service Provider: A Complete Guide
Clipping paths are closed vector paths used to mask an image so that only the...
Read More
How to make a transparent background in Photoshop
Where images speak louder than words there mastering the art of photo editing is crucial....
Read More
Photoshop Headshot Retouching Tips For Beginners
Business, fashion, and creative people require professional headshot retouching services to improve the quality of their photographs....
Read More