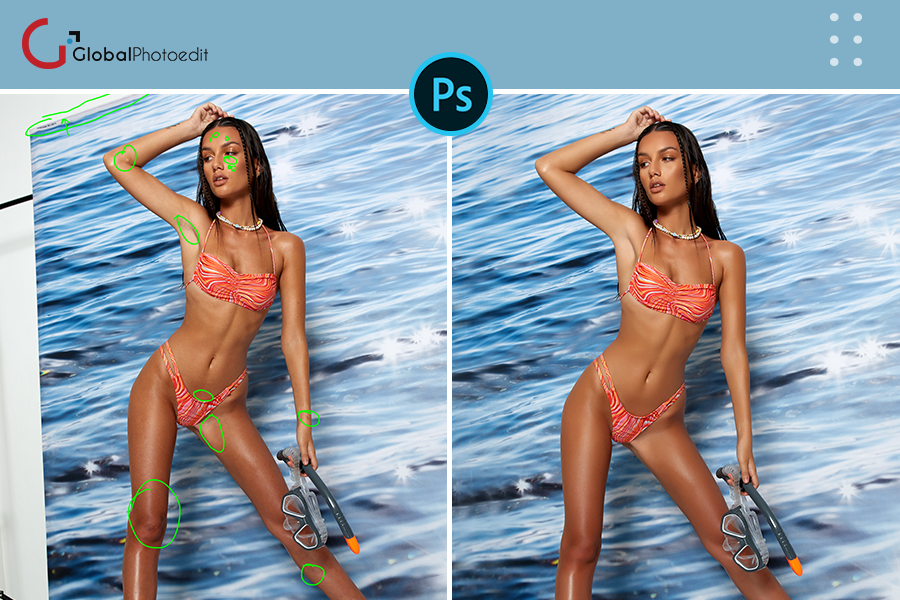
Portrait photographers aim for flawless skin in their photographs. A portrait photographer’s holy grail is to get gorgeous skin that is also realistic and retains natural skin texture. The basis for beautiful skin is expertly done makeup and adequate lighting, but retouching is the finishing touch.
In this, you’ll learn three amazing skin retouching techniques in Adobe Photoshop to remove wrinkles from photo online, as well as which circumstances each technique is best for. Then you’ll learn two quick ways for applying a final polish to corrected skin that you can use with all three procedures.
Touch-Up Layer Technique When it comes to retouching, a basic process frequently gets the job done, and this is especially true when it comes to skin. A touch-up layer is a quick and easy way to fix imperfections, marks, and stains. It can also be used to remove flakes of makeup, lint, or dust, as well as small strands of hair or any stray hair that has popped out where it shouldn’t.
Select photoshop tool
In Photoshop or any professional skin retouching in photoshop, start with your backdrop layer and put an empty layer on top of it to create a touch-up layer.
Healing brush for some touch-up
Gather your supplies. You’ll alternate between using the Clone Stamp and the Healing Brush to make your touch-ups. If the area we working on is very uniform, we will occasionally utilise the Spot Healing Brush. Make sure the tool option Sample All Layers is checked when using the Healing Brushes. If you’re going to use the Clone Stamp, make sure the Sample tool option is set to Current & Below. we will like to start with a little brush that is 50 or 75 percent hardness with all three tools. Touch-ups using a softer brush have an unnatural softness to them.

Take care of Skin texture
Use the Healing Brush to get started. Choose a new empty layer, zoom in, and make your brush size slightly larger than the blemish. Skin should be sampled in a clean area as close to the lesion as possible. Pay attention to where the skin tone varies and how the skin texture flows (for example, sideways on the forehead). If your sample is as close as possible to the region you’re retouching, you’ll get the greatest results.
Go for Natural look
For some wrinkles, the touch-up layer can be useful. Use the Clone Stamp tool if your subject has smooth, blemish-free skin and you only want to lighten a few wrinkles. If you touch up the wrinkles a little more than you wish, then lower the opacity of the touch-up layer just till the wrinkles below show enough to restore texture and a natural look, you’ll get a natural-appearing outcome.
Skin retouching in Photoshop is an editing process used by Global Photo Edit to enhance and perfect the appearance of skin in photographs. This can involve removing blemishes, smoothing out skin tones and adding a healthy glow to the subject’s skin.
Our skilled professionals employ sophisticated methods to preserve the natural texture of the skin while reducing flaws. We meticulously fine-tune the retouching process to achieve results that are both authentic and lifelike.
our expertise shines in accommodating all skin types and tones, ensuring each retouching outcomes both respects and amplifies the unique natural beauty of the subject.
Our expert team employs a diverse array of Photoshop tools, including the Healing Brush, Clone Stamp and Frequency Separation techniques, to ensure impeccable skin retouching results.
We are deeply committed to maintaining the confidentiality and security of our clients’ photos and personal information at Global Photo Edit, treating each with the highest level of privacy and care.

Related Posts
- - The Pinnacle of Professional Portrait Photo Retouching Services
- - Unveiling the Artistry of Headshot Image Retouching Services by Global Photo Edit
- - 15 Mistakes Your Online Rug Image Retouching Company Should Avoid
- - Boost Your Branding with Professional Portrait Retouching Services
- - Top 5 Tips for Choosing the Best Image Restoration Service for Your Treasured Photos
- - How a quality Product Photo Retouching Services in e-commerce business